· Hakan Çelik · OpenCV / Computational Photography · 3 dk okuma
High Dynamic Range (HDR) Imaging
High Dynamic Range (HDR) Imaging
Goal
- Learn how to generate and display HDR image from an exposure sequence
- Use exposure fusion to merge an exposure sequence
Theory
High-dynamic-range imaging (HDRI or HDR) is a technique used in imaging and photography to reproduce a greater dynamic range of luminosity than is possible with standard digital imaging or photographic techniques. While the human eye can adjust to a wide range of light conditions, most imaging devices use 8-bits per channel, so we are limited to only 256 levels.
When we take photographs of a real world scene, bright regions may be overexposed, while the dark ones may be underexposed, so we can’t capture all details using a single exposure. HDR imaging works with images that use more than 8 bits per channel (usually 32-bit float values), allowing much wider dynamic range.
The most common way to obtain HDR images is to use photographs of the scene taken with different exposure values. To combine these exposures it is useful to know your camera’s response function. After the HDR image has been merged, it has to be converted back to 8-bit to view it on usual displays. This process is called tonemapping.
In this tutorial we show 2 algorithms (Debevec, Robertson) to generate and display HDR image from an exposure sequence, and demonstrate an alternative approach called exposure fusion (Mertens), that produces low dynamic range image and does not need the exposure times data.
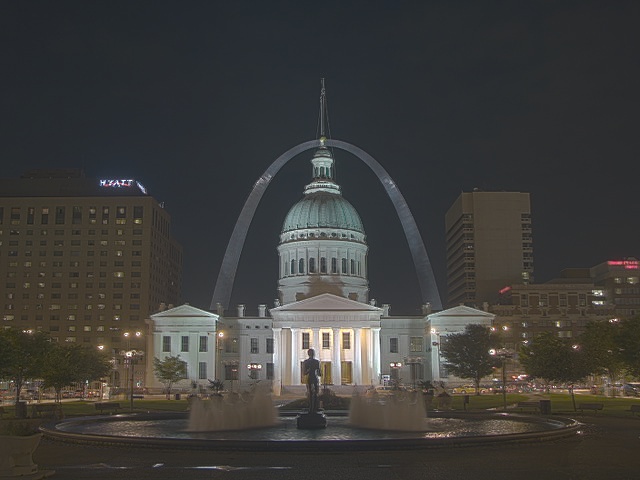
Exposure Sequence HDR
We will look at the following scene, where we have 4 exposure images, with exposure times of: 15, 2.5, 1/4 and 1/30 seconds:

1. Loading exposure images into a list
The first stage is simply loading all images into a list. In addition, we will need the exposure times for the regular HDR algorithms. Images should be 8-bit (np.uint8) and the exposure times need to be float32 and in seconds:
import cv2 as cv
import numpy as np

# Loading exposure images into a list
img_fn = ["img0.jpg", "img1.jpg", "img2.jpg", "img3.jpg"]
img_list = [cv.imread(fn) for fn in img_fn]
exposure_times = np.array([15.0, 2.5, 0.25, 0.0333], dtype=np.float32)
2. Merge exposures into HDR image
We merge the exposure sequence into one HDR image, showing 2 possibilities in OpenCV. The HDR image is of type float32, not uint8:
# Merge exposures to HDR image
merge_debevec = cv.createMergeDebevec()
hdr_debevec = merge_debevec.process(img_list, times=exposure_times.copy())
merge_robertson = cv.createMergeRobertson()
hdr_robertson = merge_robertson.process(img_list, times=exposure_times.copy())
3. Tonemap HDR image
We map the 32-bit float HDR data into the range [0..1]:
# Tonemap HDR images using gamma correction (set gamma=2.2 for standard display brightness)
tonemap1 = cv.createTonemap(gamma=2.2)
res_debevec = tonemap1.process(hdr_debevec.copy())
res_robertson = tonemap1.process(hdr_robertson.copy())
4. Merge exposures using Mertens fusion
An alternative algorithm that does not need the exposure times. The Mertens algorithm already gives us the result in the range of [0..1], so no tonemapping is needed:
# Exposure fusion using Mertens
merge_mertens = cv.createMergeMertens()
res_mertens = merge_mertens.process(img_list)
5. Convert to 8-bit and save
# Convert datatype to 8-bit and save
res_debevec_8bit = np.clip(res_debevec * 255, 0, 255).astype('uint8')
res_robertson_8bit = np.clip(res_robertson * 255, 0, 255).astype('uint8')
res_mertens_8bit = np.clip(res_mertens * 255, 0, 255).astype('uint8')

cv.imwrite("ldr_debevec.jpg", res_debevec_8bit)
cv.imwrite("ldr_robertson.jpg", res_robertson_8bit)
cv.imwrite("fusion_mertens.jpg", res_mertens_8bit)
Results
Debevec:
Robertson:
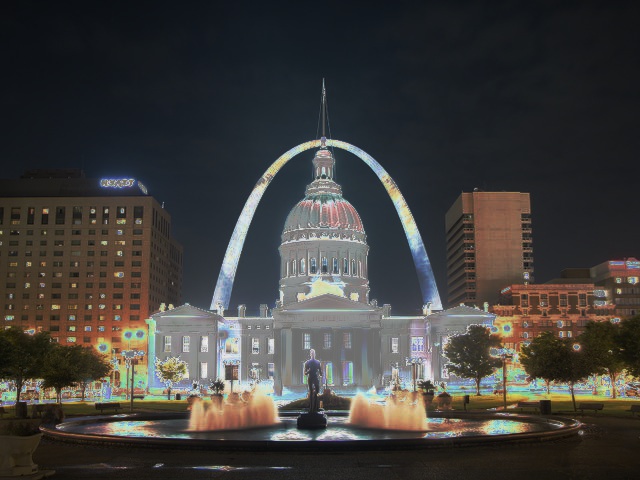
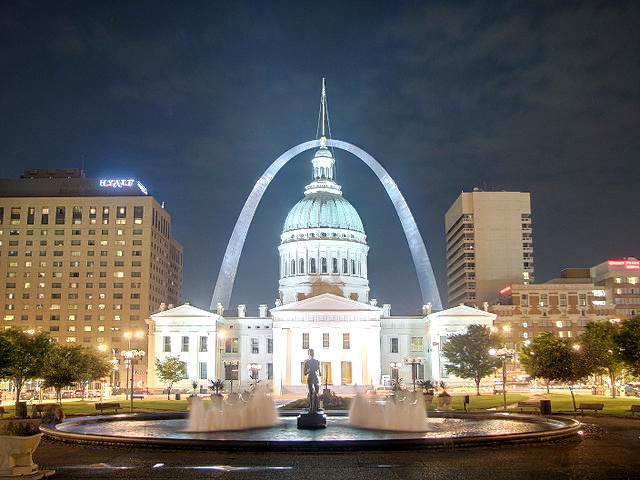
Mertens Fusion:
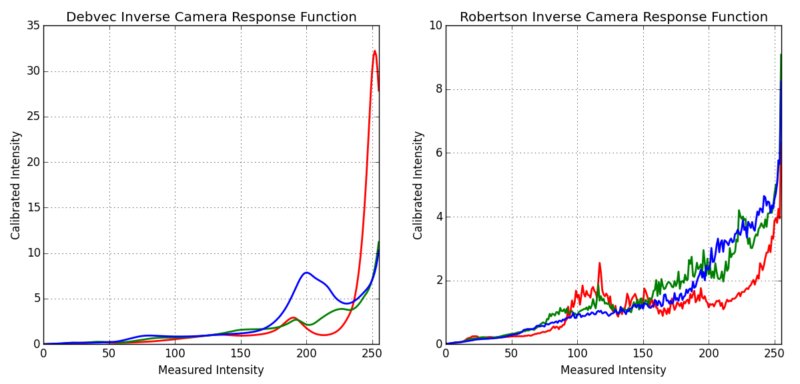
Estimating Camera Response Function
The camera response function (CRF) gives us the connection between the scene radiance to the measured intensity values. Here we estimate the inverse camera response function and use it for the HDR merge:
# Estimate camera response function (CRF)
cal_debevec = cv.createCalibrateDebevec()
crf_debevec = cal_debevec.process(img_list, times=exposure_times)
hdr_debevec = merge_debevec.process(img_list, times=exposure_times.copy(), response=crf_debevec.copy())
cal_robertson = cv.createCalibrateRobertson()
crf_robertson = cal_robertson.process(img_list, times=exposure_times)
hdr_robertson = merge_robertson.process(img_list, times=exposure_times.copy(), response=crf_robertson.copy())
The camera response function is represented by a 256-length vector for each color channel: